- If you work with the standalone version:
The dialog box Select File To Open appears if you double-click on the empty workspace of the program or if you click on the button ![]() on the Control Panel. You can also drag the required image into the workspace of the program.
on the Control Panel. You can also drag the required image into the workspace of the program.
The standalone edition of AKVIS NatureArt supports JPEG, RAW, PNG, BMP, and TIFF file formats.
- If you work with the plug-in:
Open an image in your photo editor by calling the command File -> Open or using the key combination Ctrl+O on Windows, ⌘+O on Mac.
Then call the AKVIS NatureArt plugin in the Filter/Effects menu of the photo editor:
in AliveColors: Effects -> AKVIS -> NatureArt;
in Adobe Photoshop: Filter –> AKVIS –> NatureArt;
in Corel Paint Shop Pro: Effects –> Plugins -> AKVIS –> NatureArt.

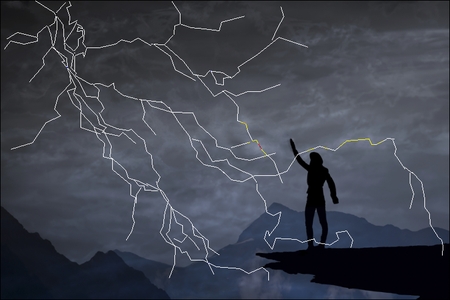
Original Photo
The program offers these nature effects: Rain, Sun, Water, Lightning, Clouds, Frost, Rainbow, Aurora, Fire, Ice, Night Sky, and Snow.
Note that Fire, Ice, Night Sky, and Snow are only available for Home Deluxe and Business licenses.
Hint: You can change the tool's size in a pop-up window which opens with a right mouse click in the image. To draw a straight line use the Shift-key.

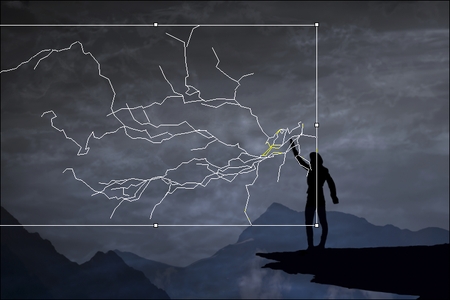
Direction Lines
You can choose how the selection looks like in the program Preferences ![]() .
.
It's possible to change the size and position of the selection with the Transform tool ![]() .
.
Hold down the Shift key to maintain the object's proportions. Hold down Alt to rotate the object by 5 degrees intervals or to scale it from its center.

Transforming Selection
You can save the selection or direction lines to a file *.nature with ![]() and load with
and load with ![]() .
.
Hint: Enable the Autorun Mode in the Preferences to apply any changes automatically. It is helpful when selecting the presets or adjusting the effect parameters.
The image will be processed, and the result will be shown in the After tab.

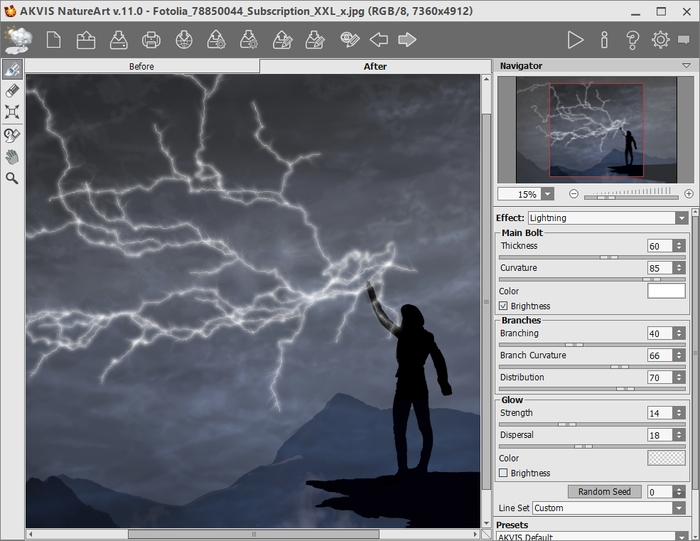
Default Settings for Lightning Effect

Adjusting Settings
Attention! If you switch to the Before tab and click on the button ![]() , the changes made with the History Brush will be lost.
, the changes made with the History Brush will be lost.
You can adjust the parameters for the tool in the pop-up box that appears after a right click in the image window:
- Size (1-1000) changes the tool's diameter.
- Hardness (0-100%) defines the blurriness of the tool's edges. The less the value the more blurry the edges of the brush are.
- Strength (1-100%) affects the degree of restoration to the original state.

Lightning Effect

Using the History Brush
To save a preset, enter its name into the Presets field and press the button Save. Now, as you start the program, it will use the settings of this preset. If you change the values of the parameters, you can always come back to the default settings of the preset by pressing the button Reset. To remove your preset, select it from the list and press Delete.
To process an image with the settings of a certain preset, select it from the drop-down menu and press ![]() if the Autorun Mode is disabled.
if the Autorun Mode is disabled.
In the standalone version, you can also print your image with ![]() .
.
- If you work with the standalone edition:
Click on the button ![]() to open the Save as dialog box. Enter a name for the file, choose the format (TIFF, BMP, JPEG or PNG) and indicate the target folder.
to open the Save as dialog box. Enter a name for the file, choose the format (TIFF, BMP, JPEG or PNG) and indicate the target folder.
- If you work with the plugin:
Press the button ![]() to apply the result and close the plugin window. The AKVIS NatureArt plugin will close and the resized image will appear in the workspace of the photo editor.
to apply the result and close the plugin window. The AKVIS NatureArt plugin will close and the resized image will appear in the workspace of the photo editor.
Call the Save As dialog box using the command File -> Save As, enter a name for the file, choose the format and indicate the target folder.
